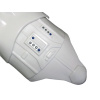
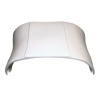
Stormtrooper - Empire Strikes Back
Visit the Gallery for this Costume for more models and parts views.
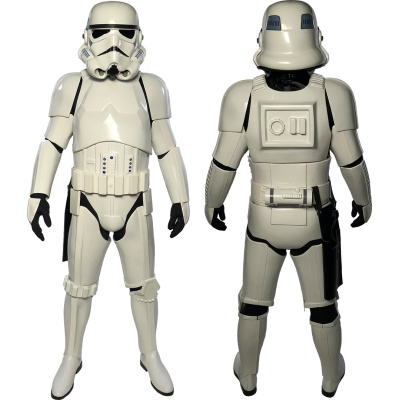
Model TK-39093, Photo by Arthur Wong
Description: Stormtrooper, Empire Strikes Back
Prefix: TK
Detachment: First Imperial Stormtrooper Detachment
Context: Episode V: The Empire Strikes Back
The Stormtroopers are the main force during the capture and interrogation of the Rebels, Han Solo, Princess Leia Organa, Chewbacca and their droid C3PO on the Cloud City of Bespin. These highly trained elite soldiers cannot be bribed or swayed from their dedication to the Empire. The Stormtroopers are not only the first strike team units sent into critical combat situations, but are also assigned to keep a watchful eye over the Imperial officers who might betray the Emperor’s cause.
This Visual Guide has been reviewed by the detachment staff and the LMO team and is certified for use as a minimum approval guideline for GMLs. GMLs are free to approve this costume type.
This is a visual guide used for 501st costume approval, not a how-to for construction. Construction details are found at the costume's Detachment website. Measurements provided here are generalized, and not criteria for approval. All 501st costumes are proportionate to the wearer in terms of size, fit, and scale. During evaluation, both text and images (CRL and Reference) must be considered. When in doubt about a feature of a submitted costume, GMLs should post questions in the Legion forum's DL/GML peer review section.
Required Costume Components
The following costume components are present and appear as described below. For 501st membership only the requirements in black need to be met. This Detachment defines additional, optional costuming details listed in blue and red. Please visit the Detachment website for more details on these options.
Helmet
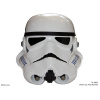
- Traps (trapezoids on dome of helmet) and tears (area beneath the corners of eye lenses) are grey.
- Rear traps and tears have vertical black lines.
- Lenses are a flat smoke or green sufficiently dark enough to obscure the costumer's eyes.
- The “ear” bars have three or four bumps and are painted grey, with a black outline. Painting the bumps with rank stripes (highlighted) in black is optional.
- Frown is painted black and does not leave the teeth area. Eight or six total teeth on the frown are cut out.
- Tube stripes are medium blue, should be 13 per side, but can be 9 and 16 per side with the curve bends extending backwards.
- Vocoder (vertically ribbed chin detail) is painted black.
- Aerators/Hovi-MIX tips (cylinders on either side of the vocoder) are black or painted black.
- Tears, traps, and tube stripes should be decals but can be hand painted, or decals that replicate hand painted.
- Mesh may be used behind the frown to obscure the face of the wearer.
- Note: The helmet is accurate in detail and proportion to official references.
- Many commercially available helmets or those considered disproportionate in size or shape are ineligible.
OPTIONAL Level two certification (if applicable):
- Ears shall have three screws used per side, one above and below the ear bar and one at the base of the helmet.
- Traps/tears and tube stripes shall be decals (with the correct ESB details), no hand-painting or decals that replicate hand painted.
- Traps/tears may be either ANH grey or a slightly bluer shade of ANH grey.
- Ear bars shall have four bumps only, not three.
- Ideally, the tube stripes are positioned approximately a pencil width from the side of the cheek.
- Fall of tube stripe tops ideally lean toward the front.
- Correct Aerators/Hovi-MIX tips are present. Screens used shall be of a wide type mesh, with the rim of the mic and the inside white or painted white.
OPTIONAL Level three certification (if applicable):
- Ear bars shall have only two to three bumps painted in black (rank stripes).
- Ideally placement of the ears (and screws) should closely follow the rear angle of the Trap above them.
- Neck trim shall be of an s-type profile rather than a u-type profile.
- The vocoder must be integrated into the helmet, and not a separate piece.
Neck Seal
- Black with horizontal ribs, fitted to the wearer, and extending from the base of the neck to conceal the entire neck.
Shoulder Straps
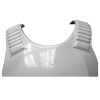
- These shall be securely mounted in front and may free float in back. They may be affixed with rivets, Velcro, or adhesive.
- The rear tab of the shoulder strap is optional and may or may not be present.
OPTIONAL Level two certification (if applicable):
- No visible rivets are allowed.
OPTIONAL Level three certification (if applicable):
- These shall free float in back.
- These shall be glued in front.
- The plastic shoulder straps need to be held down in the back via a white elastic band to the white fabric that connects/bridges the chest and back piece.
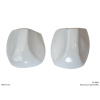
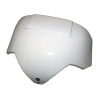
Shoulder Armor
- One on each shoulder.
- The shoulders are considered effectively symmetrical.
- They may be worn interchangeably on the left and right shoulders
- Shoulders have a black elastic strap that wraps around the inside of the bicep.
OPTIONAL Level three certification (if applicable):
- There should be a minimal gap between the shoulder armor and the chest/back plates.
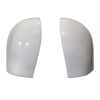
Biceps
- Biceps are fully closed.
- Overlap construction is only allowable for kits that come with the cover strip molded in to the part.
OPTIONAL Level three certification (if applicable):
- Biceps must be constructed using the butt joint and cover strip method. Overlap construction is not allowed.
- No bicep hooks are permitted.
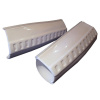
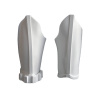
Forearms
- Forearms are fully closed.
- Overlap construction is only allowable for kits that come with the cover strip molded in to the part.
OPTIONAL Level three certification (if applicable):
- No return edge on the inside of the front of the forearm is allowed.
- Forearms must be constructed using the butt joint and cover strip method. Overlap construction is not allowed.
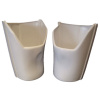
Hand Plates
- These shall be clamshell, or Snowtrooper-style hand plates and not the trapezoidal design seen in A New Hope.
- The hand plates shall be mounted securely over the back of the glove.
OPTIONAL Level two certification (if applicable):
- If rubber gloves are worn the hand plates will be affixed via an elastic strap over the palm. No stitching/holes are permitted.
- If silk or satin gloves are worn, the hand plates have the correct visible stitching with a 5 point/star pattern, equally spread out with 2 on each side and 1 in the middle front, double stitched with 2 holes at each point and sewn to the glove at each one using black thread.
Gloves
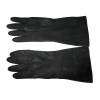
- Black in color, made of either rubber, nomex, leather, or leather-like material, with no visible straps or logos/designs. The fingers are enclosed.
OPTIONAL Level two certification (if applicable):
- Gloves must be either black silk, satin, nylon, or silk-like material, or gloves must be rubber or rubber-like chemical gloves, in black
Chest Armor
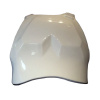
- Chest plate overlaps the abdominal plate.
OPTIONAL Level two certification (if applicable):
- Chest and back shall be connected with a white fabric or preferably elastic strap at the shoulders.
OPTIONAL Level three certification (if applicable):
- AM v1 chest plate must be replaced with a more screen accurate version.
Back Armor
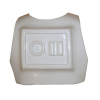
- Back plate contains a "O II" design.
OPTIONAL Level three certification (if applicable):
- Back plate shall have no, or minimal overlap of the kidney plate.
- AM v1 back plate must be replaced with a more screen accurate version.
Under Suit
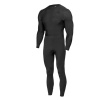
- Black non-textured material, either one-piece or two-piece construction with no visible zippers or logos.
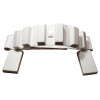
Abdomen Armor
- The abdomen armor has a button area that matches the color pattern shown (3 blue + 6 gray); buttons are approximately 7/16" (11mm) in diameter.
OPTIONAL Level two certification (if applicable):
- Any gap between the abdomen and kidney armor is no more than 1/2" (12.5mm) wide.
- Any shims used to achieve this effect are of a similar material and color as the abdomen and kidney armor. Shims fit flush and seams are allowed.
- A split (bifurcated) or single cap rivet is present on the lower tab (cod area) of the abdomen armor.
- Rivet does not need to be functional.
- Rivet on must be brass or silver in color, approximately 5/16" (8mm) in diameter and is not painted.
OPTIONAL Level three certification (if applicable):
- Ideally there no gap between the abdomen and kidney armor. Abdominal and Kidney Plate align horizontally at top.
- A single visible seam line is present.
- Three rivets, approximately 5/16"(8mm) diameter, are present on the left side of the abdomen armor.
- Note: The original rivets used for the TK armor were bifurcated rivets or split rivets.
- Rivets are equally spaced along the depth of the armor and about 10mm from the edge.
- The heads are rounded or domed. Note: Paperclip brads are not considered to have a domed head.
- Rivets are painted white.
- A single male snap on the top right corner of the ab plate is present.
- The large Ab plate detail shall be a separate piece attached to the raised center mounting area.
- Plate does not overlap the edges of this area and shall show a definite straight cut edge around all sides.
- Abdomen armor buttons are integrated and painted directly on the Ab plate.
- Ab button paint shall not extend beyond the bottom of the actual raised button.
- No separate buttons are allowed.
Kidney Armor
- A separate kidney plate is present, split from the posterior armor.
OPTIONAL Level three certification (if applicable):
- Abdominal and Kidney Plate align horizontally at top
- Cut-out notches at the bottom of right and left sides of the Kidney Armor are optional.
- If present, each notch is approximately 22 mm tall and the back of the notch ideally is aligned with the front edges of the Posterior Armor plate..
- Three rivets, approximately 5/16"(8mm) diameter, are present on the left side of the kidney plate.
- Note: The original rivets used for the TK armor were bifurcated rivets or split rivets.
- Rivets are equally spaced along the depth of the armor and about 10mm from the edge.
- The heads are rounded or domed. Note: Paperclip brads are not considered to have a domed head.
- Rivets are painted white.
Posterior Armor
- A separate rear armor piece is split from the Kidney Armor
OPTIONAL Level two certification (if applicable):
- Two male snaps are present on the lower center tab of the Posterior Armor.
- Snaps do not need to be functional.
- Snaps are silver in color with the bottom of the snap facing outward and are not painted.
Belt
- Belt face is made of plastic (TK ammo belt).
- The soft belt proper is made of canvas, or material with a canvas covering. Size must be 2.75” (70 mm) to 3.25”(83 mm) wide and not wider than the plastic portion of the belt. The color is be white to off-white.
- The drop boxes dangle from the sides of the front plastic belt (ammo belt) via white straps and are aligned under the plastic tabs of the ammo belt.
OPTIONAL Level two certification (if applicable):
- There shall be three square buttons, one centered in the middle and one on each end of the plastic ammo belt.
OPTIONAL Level three certification (if applicable):
- Drop boxes must have full inner drop boxes to close the back. Flat covers are not allowed.
- Drop boxes are vertically aligned with the end of the ammo belt with minimal gap between belt and box.
- The corners of the plastic ammo belt shall be trimmed at a 45 degree angle that that meets the outer edge of the cloth belt.
- The top of the ABS ammo belt should sit at or just above the bottom of the central and vertical abdomen button panels.
- Canvas belt can not contain patches of any sort.
- Canvas belt must be firm / sturdy in appearance. No creasing or sagging
Thermal Detonator
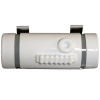
- (A.K.A. O2 canister) attaches to the center back of the belt.
- Detonator consists of an all grey cylinder, without silver stickers or silver paint.
- The cylinder is between 2” (50mm) and 2.68"(68mm) in diameter with white end caps on each end.
- The white control panel raised ribbed pad faces the rear, with the controls/round washer style detail closest to the right end cap.
- The total length is approximately 7.50" (190.5mm).
- End caps are approximately .78" (20mm)in width.
- The thermal detonator is attached via metal or metallic-appearing clips, approximately 1" (25mm) wide.
OPTIONAL Level two certification (if applicable):
- Clips shall be attached with slotted type, flat or dome top style screws, and be black (two per clip).
- V head screws are not permitted.
- Thermal detonator belt clips are positioned with little to no gap between the clips and the end caps.
- The vertical (straight) section of the clips do not extend past the bottom of the canvas belt
Thigh Armor
- Thigh armor shall be closed in the back.
- The small ammo belt is installed on the bottom of the right thigh.
- The bottom corners of the thigh ammo belt are rounded off.
- Overlap construction is only allowable for kits that come with the cover strip molded into the part.
- Cover strip must end at the top of the lower ridge in front and back.
OPTIONAL Level two certification (if applicable):
- Thigh ammo belt is attached to thigh with a solid head rivet, painted white, in the upper corner and fastened to the lower thigh ridge.
- The rivets used shall be single cap, double cap or split rivets. No pop rivets allowed.
- Rivet should be approximately 5/16" (8mm) in diameter (exterior).
OPTIONAL Level three certification (if applicable):
- Thighs are constructed using the butt joint and cover strip method.
- Overlap construction is not allowed.
- Lower thigh ridge joins (front and rear) shall butt-up flush against each other. Any gaps must be backed with ABS or filled as not to be noticeable.
- Any mobility cuts on the back do not extend beyond the top of the raised ridge.
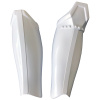
Lower Leg Armor
- Greaves close in the back. The trapezoid knee plate (sniper knee plate) is affixed to the left greave.
- Overlap construction is only allowable for kits that come with the cover strip molded in to the part.
- The AM v1 greaves (shins) shall be on the proper legs, with a new cover strip. The cover strip edge shall be facing the inside of the leg. Note: There is a manufacturer defect with the AM greaves (shins) that may cause you to wear the them improperly. Please see the Tutorial titled :"AM armor shins: the proper way to assemble and wear", on the whitearmor.net
OPTIONAL Level two certification (if applicable):
- Sniper knee plate must be aligned with the ridges on the shin.
- Sniper knee plate must not have visible rivets or fasteners attaching it to the shin.
OPTIONAL Level three certification (if applicable):
- Lower legs must be constructed using the butt joint and cover strip method. Overlap construction is not allowed.
- Any mobility cuts on back of piece do not go past raised ridges.
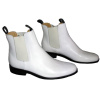
Boots
- Boots are above ankle height and made of white leather or leather-like material.
- Small U-shaped elastic sections on both sides of the ankle.
- Flat sole with a short heel.
- No buckles or laces.
- Jodhpur/ Chelsea-type boots or an equivalent style is acceptable.
- Elvis or Mariachi boots are not allowed.
OPTIONAL Level two certification (if applicable):
- There is no seam present on the front of the boot.
- Boots have a black sole
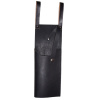
Holster
- Holster is made of black leather or leather-like material.
- Holster is worn on right side of belt.
- Holster is affixed via two black loops over the belt (no fasteners).
Optional Accessories
Items below are optional costume accessories. These items are not required for approval, but if present appear as described below. If adding in an accessory after initial approval, the item still needs to be submitted to local GML for approval before use.
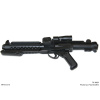
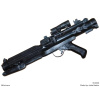
E-11 Blaster (ESB)
- Based on a real or replica Sterling sub-machine gun, scratch-built, or a modified commercial toy Stormtrooper blaster.
OPTIONAL Level two certification (if applicable):
- Folding stock (does not need to function).
- No ammo counter shall be present.
- D-ring mounted on the rear.
- Sterling based blasters have the correct M-38 or M-19 style scope.
- The M-19 scope is preferred.
- No power cylinders on the magazine housing.
- Scratch-built, resin cast, Hyperfirm rubber cast blasters shall have a total of 6 T-tracks on blaster (leaving the lowest row on the magazine housing side uncovered).
- If using the Hasbro E11 toy blaster, it is modified to have the correct number of T-tracks (6 total), with a lower row of open vent holes on the magazine housing side.
- This is accomplished by covering the pre-existing rows of holes with T-tracks, then grinding off the lower integrated T-track on the magazine housing side, and drilling a new row of holes in its place.
- 3D printed blasters can not contain visible print lines and must be sanded smooth for a more realistic appearance.
OPTIONAL Level three certification (if applicable):
- Hasbro blasters are not allowed, even conversions.
- T-tracks and grip shall be black with no solver/metallic weathering allowed.
- 3D printed blasters can not contain visible print lines and must be sanded smooth for a more realistic appearance.
E-11 Blaster (promo)
- Based on a real or replica Sterling sub-machine gun, scratch-built, or a modified commercial toy Stormtrooper blaster.
OPTIONAL Level two certification (if applicable):
- Folding stock (does not need to function).
- No ammo counter shall be present.
- Correct style scope.
- No power cylinders on the magazine housing.
- Scratch-built or cast blasters shall have a total of 6 T-tracks on blaster (leaving the lowest row on the magazine housing side uncovered).
- If using the Hasbro E11 toy blaster, it is modified to have the correct number of T-tracks (6 total), with a lower row of open vent holes on the magazine housing side.
- This is accomplished by covering the pre-existing rows of holes with T-tracks, then grinding off the lower integrated T-track on the magazine housing side, and drilling a new row of holes in its place.
- Two greeblies on the left rear area.
- Three studs on the right rear area.
- Add two scope block greeblies.
- Remove front bayonet muzzle disk.
- Remove magazine housing parts.
- Remove D-Ring mount.
- Swoosh trim on right side above the pistol grip.
OPTIONAL Level three certification (if applicable):
- Hasbro blasters are not allowed, even conversions.
